Installation

  • Upload the entire `RFQWP` folder to the `/wp-content/plugins/` directory.
  • Activate the plugin through **Plugins** screen (**Plugins > Installed Plugins**).
  • Find **RFQWP** menu on your WordPress admin screen.

Quick start

Generate a Pre-created form

  • Navigate to forms under RFQWP admin menu in your wordpress admin menu.
  • Click on the ‘Open Pre-created form list’ button and select a form and import it.
  • Now the pre-created form is automaticaly created and added to your list.
  • Now let’s continue with the content.

Select style

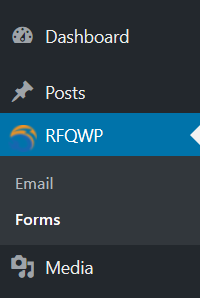
First, on the form list page select your form and click on the eye icon to open the details.
Under the style tab, we can set a very basic style.
If you want, you can easily change all style palettes:
  • Click on “open pre-created styles” button
  • Click the import button below the style what you wish
  • Do not forget to save the changes!

Add the shortcode to your WP page

Create your first form

  • Navigate to forms under RFQWP admin menu in your wordpress admin menu.
  • Click on the + Create button and a new form panel appears.
  • Write down your form’s name and click on the create button.
  • Congratulations, you have successfully created your first form!
  • Now let’s continue with the form’s content.

Configure form

Click on the eye icon to customize your form.

Content tab

Here we can create a very basic content.

  • Click on the “Add new column” button to add your first column to your form.

You can choose your columns displaying size for each screen resolution.

  • Now set your column size inputs to 12,12,12.
  • Click on the “New card” button to add a card to your form.
  • Set your card size inputs to 12,6,6.
  • Open the “New question” panel and add the following inputs by clicking on them:
    1. Gender
    2. Email
    3. Text
    4. Text

Gender

  • Click on Input options.
  • Set the size to 12,6,6.
  • Set the requirement.
  • Note (only in the email): leave it empty
  • Note (only in the form): leave it empty
  • Under items modify the inputs as you wish

Email

  • Click on Input options.
  • Set the size to 12,6,6.
  • Choose email as a special element by clicking on it.
  • This field is required if the parent card is required.
  • Input pattern text: add a text, which appears until the user clicks on the input field.
  • Note (only in the email): leave it empty
  • Note (only in the form): leave it empty

First text

  • Click on Input options.
  • Set the size to 12,6,6.
  • Choose first name as a special element by clicking on it.
  • Question title: First name
  • Set the requirement as you wish.
  • Input pattern text: add a text, which appears until the user clicks on the input field.
  • Note (only in the email): leave it empty
  • Note (only in the form): leave it empty

Second text

  • Click on Input options.
  • Set the size to 12,6,6.
  • Choose last name as a special element by clicking on it.
  • Question title: Last name
  • Set the requirement as you wish.
  • Input pattern text: add a text, which appears until the user clicks on the input field.
  • Note (only in the email): leave it empty
  • Note (only in the form): leave it empty

Now add a second card

  • Click on the “New card” button to add a card to your column.
  • Set your new card size inputs to 12,6,6.
  • Open the “New question” panel and add the following input:
    1. Textarea
    2. Accept and send form question

Textarea

  • Click on Input options.
  • Set the size to 12,12,12.
  • Question title: Message
  • Set the requirement as you wish.
  • Input pattern text: add a text, which appears until the user clicks on the input field.
  • Note (only in the email): leave it empty
  • Note (only in the form): leave it empty
  • Number of rows: set the height by setting the number of rows (5 is recommended)

Accept and send form question

  • Click on Input options.
  • Set the size to 12,12,12.
  • Question title: Accept and send
  •  Requirement: this question can only be required
  • Note (only in the email): leave it empty or write a note
  • Note (only in the form): leave it empty or write a note
  • Send button text: Accept and send
  • Privacy policy/GDPR text: Accept privacy policy or modify as you wish
  • Accepting privacy policy: Accepted privacy policy/GDPR or modify as you wish

The content of the basic form is finished, don’t forget to save it!


Email configuration tab

Here you can customize the emails. Set the following inputs:

  • Admin email: email address of the admin
  • Sender name and email: email address and name by whom the email was sent
  • Send admin/user email: set who should receive an email after submitting the form

Email configuration tab​ is ready, don’t forget to save it!

Settings tab

Set “add price” to no.

Settings tab is finished​, don’t forget to save it!

Add your form shortcode to WP page

  • You can find the shortcode in the settings tab.
  • Place it on your wp page!

Open your WP page and you are ready to use your first RFQWP form.

Contact

If you have any further question please contact us